Hang your curtain rod a few inches above the window frame and extend it several inches past the frame on each side. That is the baseline for most rooms with standard ceilings. Everything else, from puddle hems to bay window fixes, is a variation on that one formula, and the exceptions below will tell you exactly when to bend it.
TL;DR:
- Mount the curtain rod 6 to 12 inches beyond the window frame to create the illusion of larger, taller windows, but avoid exceeding one-third of the window’s width.
- Hang the rod 4 to 6 inches above the frame for standard ceilings, but extend it up to 12 inches for rooms with high ceilings, and adjust height near crown molding for low-ceiling rooms.
- Use proper hardware, including sturdy anchors and center support brackets for long or heavy rods, to prevent sagging and ensure secure mounting over time.
- When raising the rod, remeasure fabric length options such as puddle or kiss hems, as higher placement often requires longer panels for optimal appearance.
- DIY installation suits drywall with accessible studs, but heavier or complex setups involving plaster or masonry walls typically require professional help to avoid structural failures.
Table of Contents
- The ‘High and Wide’ Rule: Why Mounting Higher Changes a Room
- How Far Should Curtain Rods Extend Past the Window?
- How High Should You Hang Curtains Above the Window?
- Kiss, Float, or Puddle: How Length Changes Your Rod Height Choice
- Bracket Placement, Anchors, and Structural Support
- Step-by-Step: Measuring and Marking for a Level Install
- Fixing Placement for Bay, Arched, and Awkward Windows
- Placement Mistakes That Quietly Ruin the Look
- Expert Notes From the Field: Blocking, Grommets, and When to Call a Pro
- Why Proportion Rules Belong in Every Well-Composed Room
- Shop the Hardware That Makes These Rules Work
- Sources
- FAQ
The ‘High and Wide’ Rule: Why Mounting Higher Changes a Room
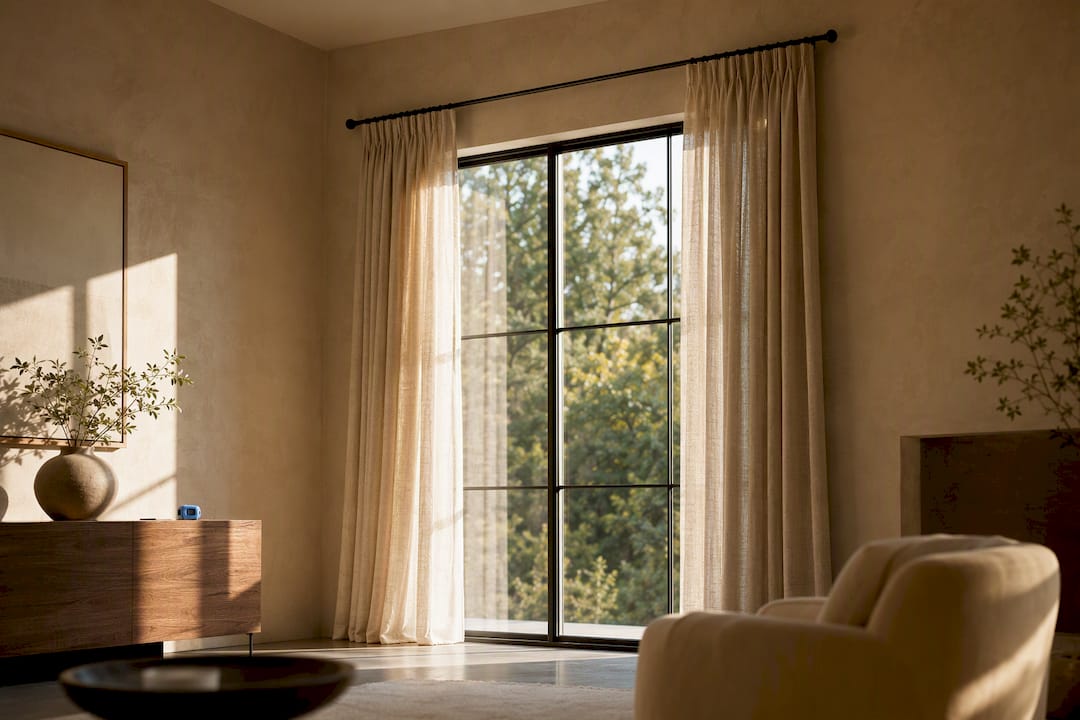
Interior designers have a name for the trick that makes a modest window look grand: the High and Wide rule. Mount the rod closer to the ceiling than the window frame, and extend it beyond the glass on both sides. The eye reads the extra wall space as part of the window, so the whole opening appears taller and broader than it actually is.
The effect comes down to how we process vertical lines. A curtain that starts near the ceiling draws the gaze upward, which makes the ceiling itself feel higher, even when it hasn’t moved an inch. Extending the rod outward does the same job sideways, stretching the perceived width of the glass without touching a saw or a wall.
This rule earns its keep most in smaller rooms with average, 8 foot ceilings, where every extra inch of visual height matters. Designers commonly recommend hanging curtains several inches above the frame, or splitting the distance to the ceiling when space is tight, according to The Spruce. In a room that already has soaring ceilings or an oversized window, pushing the rule too far can look theatrical rather than intentional.
A few situations call for restraint:
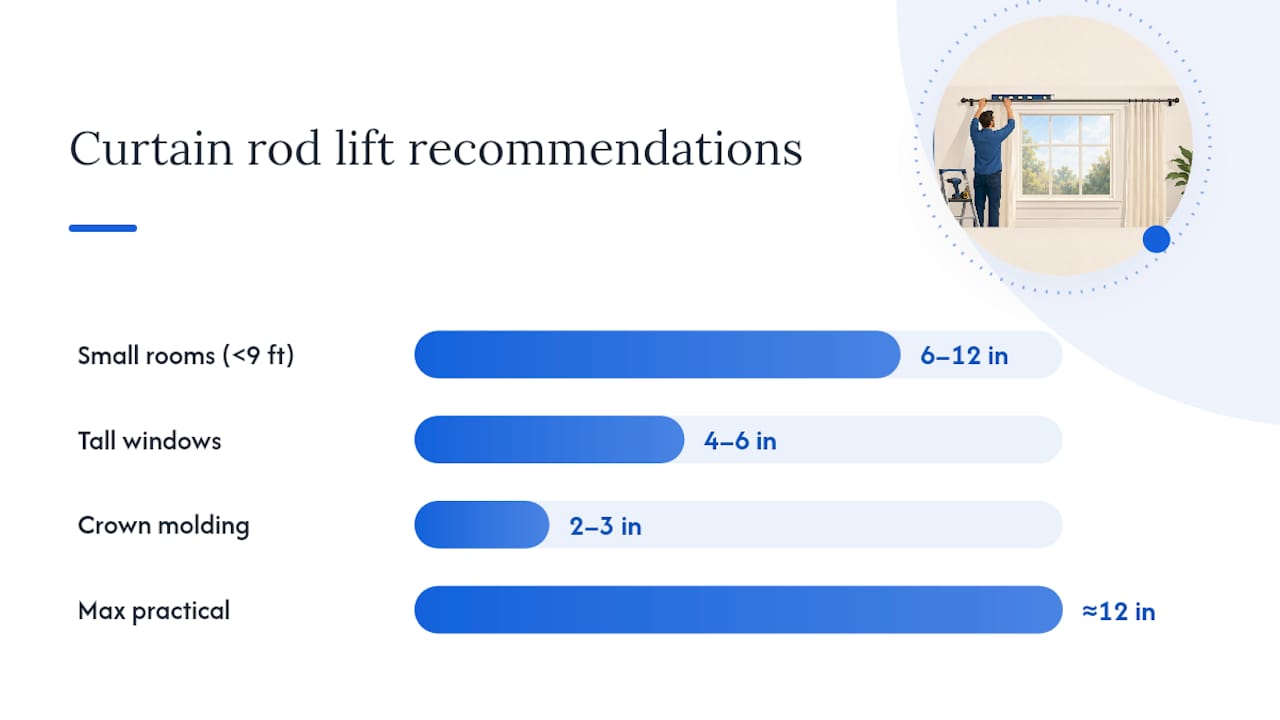
- Rooms under 9 feet with low headroom benefit most from the full 6 to 12 inch lift.
- Already-tall windows near ceiling height need only a modest 4 to 6 inch clearance.
- Rooms with visible crown molding should mount 2 to 3 inches below the trim so hardware doesn’t compete with it.
Rod placement generally shouldn’t exceed roughly a foot above the frame. Beyond that, the gap between rod and glass starts to look like a mistake instead of a design choice, according to The Design Confidential.
How Far Should Curtain Rods Extend Past the Window?
Width does as much visual work as height, and it is often the piece homeowners skip. The standard range is several inches of extension on each side of the window frame, which lets curtains clear the glass completely when opened and widens the frame’s apparent footprint, per BobVila.
There is an upper limit worth respecting: avoid extending the rod more than about a third wider than the window itself. Past that point, the proportions start to feel off, even in a room that could technically fit a longer rod.
Extension also dictates how much fabric you need. Designers generally aim for panel widths totaling roughly one-and-a-half to two-and-a-half times the width of the window across both panels, which keeps the curtains looking full instead of stretched thin against the rod.
Here’s how that plays out on two common window sizes:
- 36-inch window: Add several inches per side for a rod wider than the window; panels should be appropriately wider to look full.
- 54-inch window: Add several inches per side for a rod wider than the window; panels should be proportionally wider for fullness.
Some modern styling guides push extension further still, up to 8 to 15 inches per side, for a maximal, airy look when fabric is sheer or the room calls for drama, according to Curtarra. Just remember: wider rods need proportionally wider panels, or you end up with skimpy curtains stretched across too much hardware.
How High Should You Hang Curtains Above the Window?
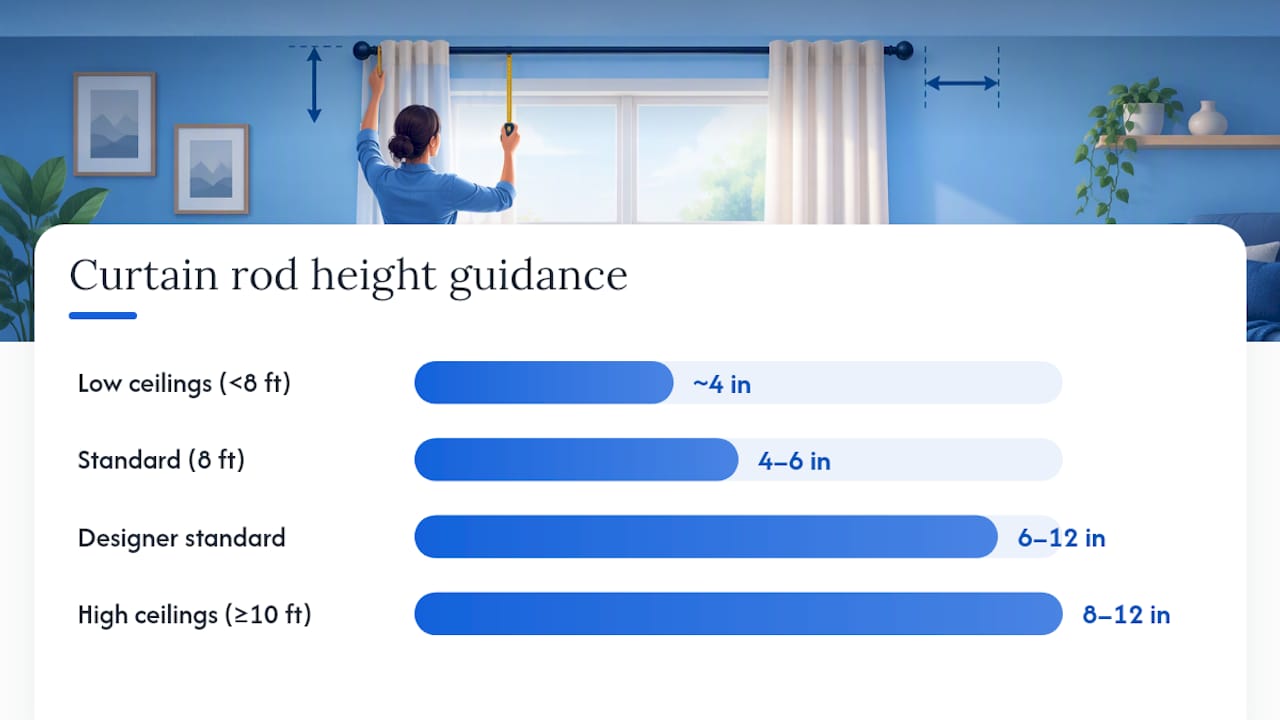
The core height rule holds for most rooms: mount the rod 4 to 6 inches above the window frame. For rooms with a standard 8 foot ceiling, aim to land the rod 2 to 3 inches below the ceiling or crown molding, whichever comes first, according to The Design Confidential.
Ceiling height changes the math meaningfully:
- Standard 8 foot ceilings: 4 to 6 inches above the frame, or 2 to 3 inches below the ceiling line if that lands lower.
- High ceilings (10 feet or more): 8 to 12 inches above the frame creates the dramatic look these rooms can handle, per The Design Confidential.
- Low ceilings (under 8 feet): stick closer to 4 inches, and prioritize mounting near the ceiling over a fixed inch count.
Designers commonly cite a 6 to 12 inch range above the frame as the standard, according to The Spruce, with the exact number depending on how much wall space you have to work with. In rooms with limited clearance between the window and ceiling, splitting the distance in half often looks more balanced than forcing a full 12 inch lift.
Raising the rod close to the ceiling line has a practical side benefit: it often lets you use standard 96 inch panels without hemming, since that length matches typical ceiling heights, per The Spruce. Push the rod higher, though, and you commit to buying or altering longer panels. Measure the actual floor-to-rod distance before you order curtains, not just the floor-to-frame distance.
Kiss, Float, or Puddle: How Length Changes Your Rod Height Choice
Rod height and curtain length are closely connected decisions. The way fabric meets the floor influences how high the rod should be and how long the panels need to be.
Kiss hems land just above the floor, offering a clean and popular look. Float hems hover slightly off the ground, giving more clearance for frequently used curtains. Puddle hems pool some extra fabric on the floor for a formal look suitable for less-used rooms, per BobVila.
Each style carries a trade-off:
- Kiss and float hems suit high-traffic rooms and pets, since fabric stays clear of foot traffic and dust.
- Puddled hems collect dust and pet hair fast, and they snag underfoot if the curtains get opened regularly.
- Most ready-made panels run 94 to 96 inches, which works for standard-height kiss or float hems but often needs hemming or a custom order for puddling or a raised rod.
If you’re raising the rod per the High and Wide rule, always remeasure floor-to-rod distance before buying panels. A curtain sized for the frame height will float awkwardly short once the rod moves up. For more on choosing hem styles that fit a room’s overall mood, bedroom curtain styling offers additional pairing ideas.
Bracket Placement, Anchors, and Structural Support
Good measurements mean nothing if the hardware pulls out of the wall six months later. Bracket placement and anchoring decide whether your curtains hang straight for years or slowly sag toward one side.
- Position end brackets close to the rod’s finials, typically within 2 to 4 inches of each end, so the rod doesn’t flex or bow under the weight of the fabric.
- Locate studs with a stud finder before drilling anything. Mounting into a stud is always the strongest option when the bracket location allows it, according to This Old House.
- Use quality toggle bolts when a stud isn’t available. Standard plastic anchors sink into drywall over time under heavy drapery, and hollow-wall failures are the most common installation mistake homeowners run into.
- Add center support for rods longer than about 48 inches on thin metal rods, or 60 inches on heavier wood or steel rods. A center bracket every 48 to 60 inches, depending on the rod’s weight rating, prevents the visible dip that shows up in the middle of long spans.
- Consider blocking behind the drywall for heavy blackout drapes or a bracket location that misses every stud. A carpenter can add blocking through attic or closet access with minimal wall repair, which gives you a solid mounting point exactly where the design calls for it, per This Old House.
- On plaster or masonry walls, use masonry anchors rated for the wall material, not the drywall anchors that come packaged with most rod kits.
- Test for sag before calling the job done. Hang the curtains, wait a day, and check the rod’s center line with a level.
Pro Tip: If you’re renting and can’t drill into studs or add blocking, pair toggle anchors at both end brackets with a center support rather than skipping center support altogether. That combination handles the weight of heavy curtains without requiring any destructive work behind the wall, according to This Old House.
Step-by-Step: Measuring and Marking for a Level Install
Get these steps right and you’ll never eyeball a bracket again.
- Gather your tools: tape measure, a 24-inch level, stud finder, drill, appropriate anchors or toggle bolts, and a pencil.
- Measure the window’s width and height from the outer edge of the frame, not the glass itself.
- Choose your extension (6 to 12 inches per side) and mark those points lightly in pencil.
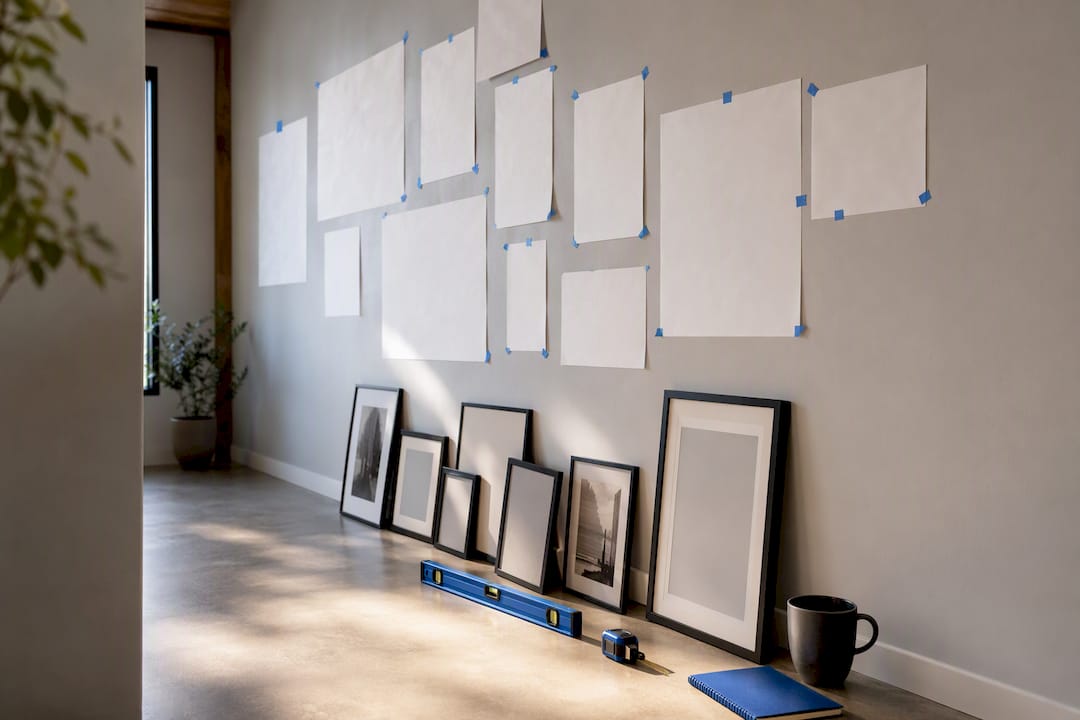
- Cut a cardboard template matching the height and extension on one side, then flip it to confirm the second bracket lands at an identical spot. This catches uneven walls before you drill.
- Hold the rod (or its brackets) against the wall at your marked height, and use the level to draw a straight horizontal reference line connecting both bracket points.
- Mark pilot hole locations on that line, then drill and set anchors according to your wall type.
- Mount the brackets, hang the rod, and check level again with the curtains on, since fabric weight sometimes reveals a slight lean that an empty rod won’t show.
- Stand back ten feet and check symmetry. Small asymmetries are far easier to fix with an adjustment now than after the anchors are fully set.
Fixing Placement for Bay, Arched, and Awkward Windows
Standard rules assume a flat wall and a rectangular window. Plenty of homes don’t offer that.
- Bay and corner windows usually need a curved track or multiple joined rods with return brackets, so curtains wrap the angle instead of leaving gaps at each corner.
- Arched windows rarely take a rod well. Inside-mount shades or custom-curved rods that trace the arch work best, or simply hang straight curtains from a baseline rod mounted at the arch’s widest point and let the fabric ignore the curve entirely.
- Transom windows above a door or main window often look best with a single continuous rod or matching shade that treats both openings as one visual unit, rather than a rod squeezed awkwardly under a soffit.
- Soffits and low headers may force a ceiling-mounted track instead of a wall bracket, especially when there’s less than 4 inches of wall space above the frame.
Placement Mistakes That Quietly Ruin the Look
Small errors compound fast in curtain installation, and most have easy fixes.
- Rod mounted too low, right at the frame: raise it and re-drill; patch the old holes with spackle.
- Rod too narrow, curtains covering part of the glass: swap for a longer rod or add extension brackets rather than replacing the whole setup.
- No center support on a long rod: add one now, even after the fact. Sag only gets worse with time.
- Panels too skinny for the rod width: buy a second pair and layer them, or size up on your next order using the 1.5 to 2.5 times width ratio.
Expert Notes From the Field: Blocking, Grommets, and When to Call a Pro
Heavy blackout drapes put real stress on a wall, and that’s exactly when blocking earns its cost. If your bracket needs to land somewhere a stud isn’t, a small carpenter job to add blocking behind the drywall solves the problem permanently instead of hoping a toggle bolt holds forever.
DIY installation works well for standard rods on drywall with accessible studs. Hire a professional when you’re dealing with plaster walls, masonry, vaulted ceilings, motorized tracks, or any rod carrying more than a few pounds of fabric. The cost of a pro visit is small compared to a rod pulling out of the wall at 2 a.m.
Pro Tip: For grommet curtains, always measure from the top of the grommet ring to the floor, not from the fabric’s cut edge. The ring sits an inch or two below the rod itself, and that gap changes your final hem calculation more than most people expect.
Why Proportion Rules Belong in Every Well-Composed Room
Numbers like “6 inches” and “one-third wider” sound clinical, but they’re really about balance. A room reads as calm and intentional when its vertical and horizontal lines agree with each other, and curtain placement is one of the few architectural details a renter or homeowner can fully control.
— Nealda
Shop the Hardware That Makes These Rules Work
None of this measuring pays off without hardware sturdy enough to hold it. A rod that flexes at the center or anchors that loosen after a season will undo even a perfectly calculated High and Wide layout, and that’s the gap curated picks are meant to close: real product recommendations chosen for weight rating and finish, not just looks in a listing photo.

Look for rods rated for your actual fabric weight, center support brackets sized to your rod’s span, heavy-duty toggle anchors for hollow walls, and a hemming tape or kit if you’re adjusting panel length after raising your rod. The Store Finds collection features this kind of hardware and styling piece in one place, so you’re not guessing your way through a hardware aisle. Pair it with our DIY home decor guides for hemming and small install projects, then browse Store Finds to pick the rod, anchors, and finish that match your room.
Sources
- How high to hang curtains a complete guide – The Design Confidential
- How high to hang curtains above windows, solved! – BobVila
- Should you hang curtains higher than the window frame? – The Spruce
- How To Hang a Curtain Rod – This Old House
FAQ
How far should curtain rods extend past the window?
Extend the rod 6 to 12 inches beyond the window frame on each side, which lets curtains clear the glass and makes the window look wider, according to BobVila. Avoid extending more than one-third wider than the window frame itself.
What is the rule for hanging curtain rods?
The most common guideline is the High and Wide rule: mount the rod 4 to 6 inches above the frame and extend it 6 to 12 inches past each side. In rooms with high ceilings, designers push that height to 8 to 12 inches above the frame for a more dramatic effect, per The Design Confidential.
How high should curtains hang above the window?
For standard 8 foot ceilings, mount the rod 4 to 6 inches above the frame, or 2 to 3 inches below the ceiling or crown molding if that lands lower. Rooms with 10 foot or taller ceilings can handle 8 to 12 inches above the frame without looking disconnected from the window, according to The Design Confidential.
How far should a bracket be from the end of a curtain rod?
Keep end brackets within a few inches of the rod’s finials, close enough to prevent flex but far enough to clear the curtain rings or hardware. For any rod longer than about 48 to 60 inches, add a center support bracket to stop the middle of the rod from sagging under the fabric’s weight.
Do I need a professional to install curtain rods?
Standard rods into drywall with accessible studs are a manageable DIY project for most homeowners. Plaster walls, masonry, vaulted ceilings, or heavy blackout drapes needing blocking are situations where hiring a professional prevents costly hardware failure down the line.