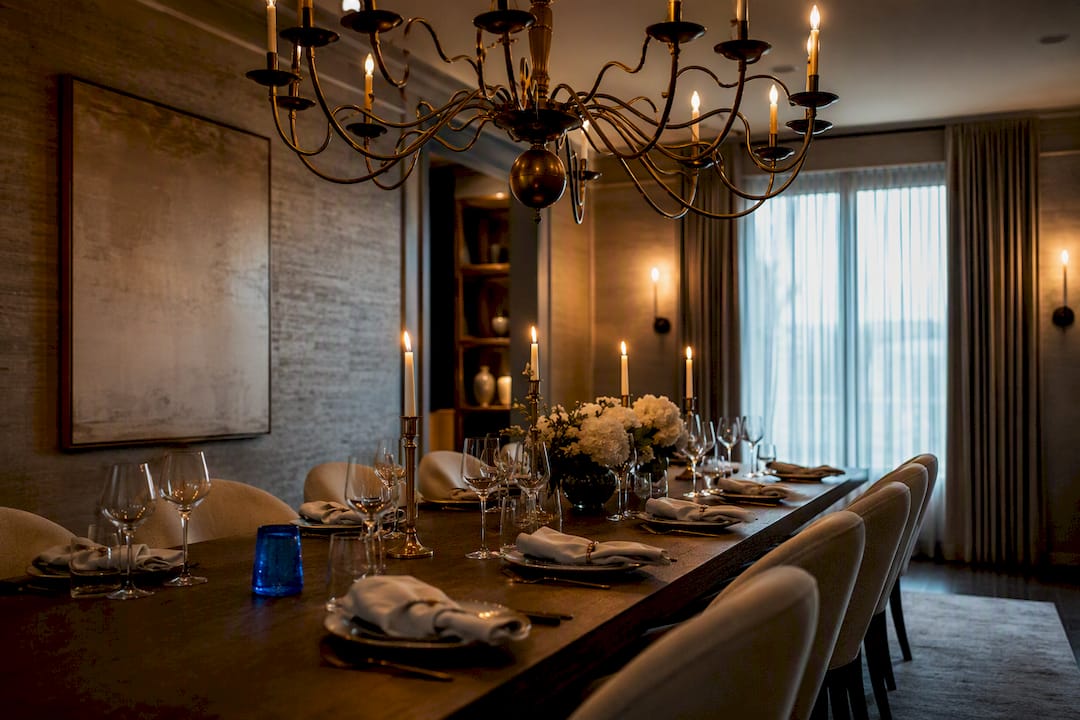

A statement ceiling is one of the fastest ways to shift a room’s entire personality — and designers have been making the case for years that the fifth wall deserves as much intention as any other surface. Whether you’re drawn to a single bold paint color, a wallpapered tray inset, or the warmth of exposed wood beams, the right ceiling treatment can reframe a space from the top down.
The short verdict: yes, a statement ceiling is worth doing for most homeowners. The key is matching the treatment to the room’s proportions, your maintenance tolerance, and how long you want it to last.
Here’s a fast map of the most reliable treatment categories:
- Paint (solid color, high-gloss, color-drenching): Best for low-commitment experimentation and small rooms like powder rooms or nurseries
- Wallpaper and partial wallpaper: Best for adding pattern with limited risk; removable options suit renters and the change-prone
- Coffered and tray ceilings: Best for formal living rooms and primary bedrooms where architectural permanence adds lasting value
- Exposed or faux beams and shiplap: Best for rustic, farmhouse, or biophilic interiors seeking warmth and texture
- Murals and geometric paint: Best for rooms that need a focal point and can carry a bold artistic moment
- Metallic finishes and gold/silver leaf: Best for dining rooms, entryways, and spaces where drama and light reflection matter
- Wood paneling and planks: Best for cozy reading rooms, libraries, and bedrooms where material warmth is the goal
- Tin and pressed-metal tiles: Best for kitchens, bars, and period-style spaces seeking a textural, historical reference
- Textured plaster and 3D treatments: Best for contemporary or eclectic rooms that want sculptural depth without heavy construction
Key Takeaways
Statement ceilings are worth doing in almost any room, and the most reliable path is to start with a low-commitment treatment, test finishes in situ, and plan lighting before any surface work begins.
| Point | Details |
|---|---|
| Start low-risk | A powder room or small hallway is the ideal first statement ceiling — bold choices carry less risk in compact spaces. |
| Test paint on the ceiling | Colors read darker and more intense overhead; always apply a large swatch and observe it through a full day’s light cycle. |
| Plan lighting first | Map all wiring before installing any surface treatment; retrofitting fixtures into finished ceilings raises cost significantly. |
| Match treatment to room height | Rooms under eight feet struggle with deep coffers or thick beams; rooms at nine feet or more can carry almost any treatment. |
| Choose for longevity | Ceilings are more labor-intensive to rework than walls; select treatments you’ll genuinely enjoy for years, not just for the photo. |
1. The best statement ceiling ideas, organized by category
Designers commonly call the ceiling the “fifth wall,” and recent editorial surveys confirm that bold, intentional ceiling treatments are replacing the default white across every room type. The 30 ideas below are grouped by treatment category, each with a one-line “best for” note and a practical execution tip.
Painted ceilings
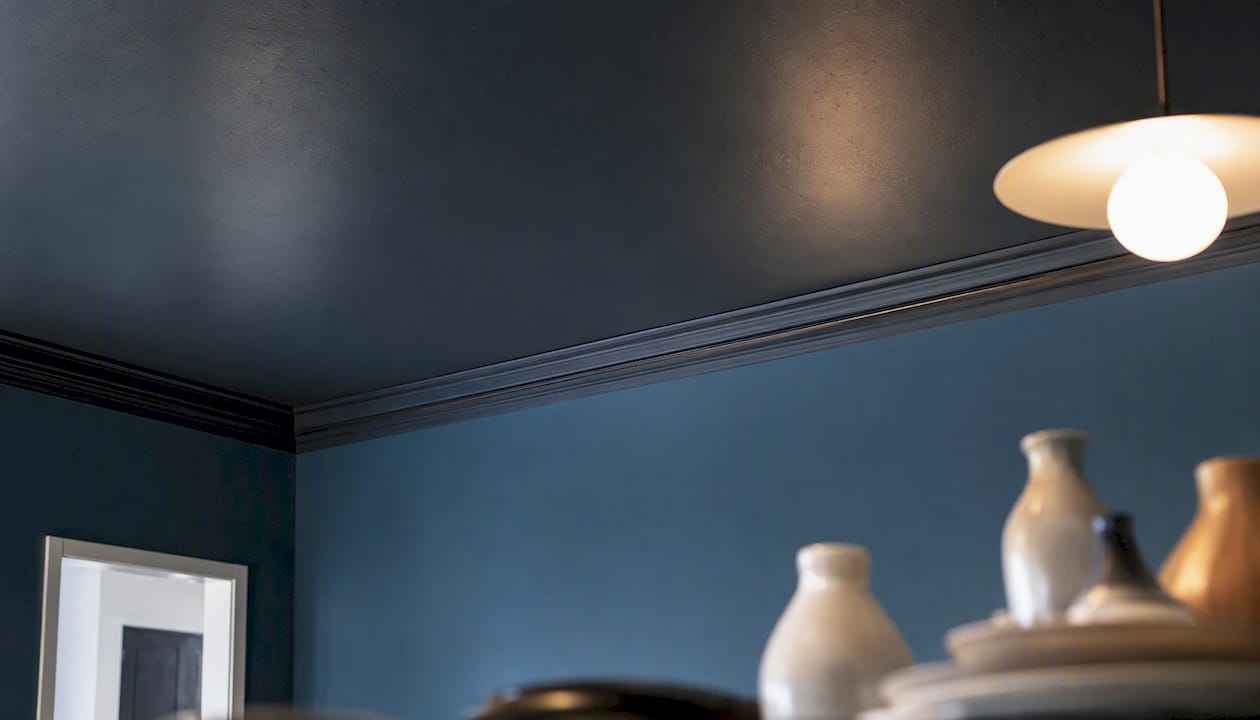
1. Deep, moody solid color
Best for powder rooms, dining rooms, or any space where you want drama without structural work. Choose a shade two to three values darker than your wall color and apply with a low-nap roller for a smooth, even finish.
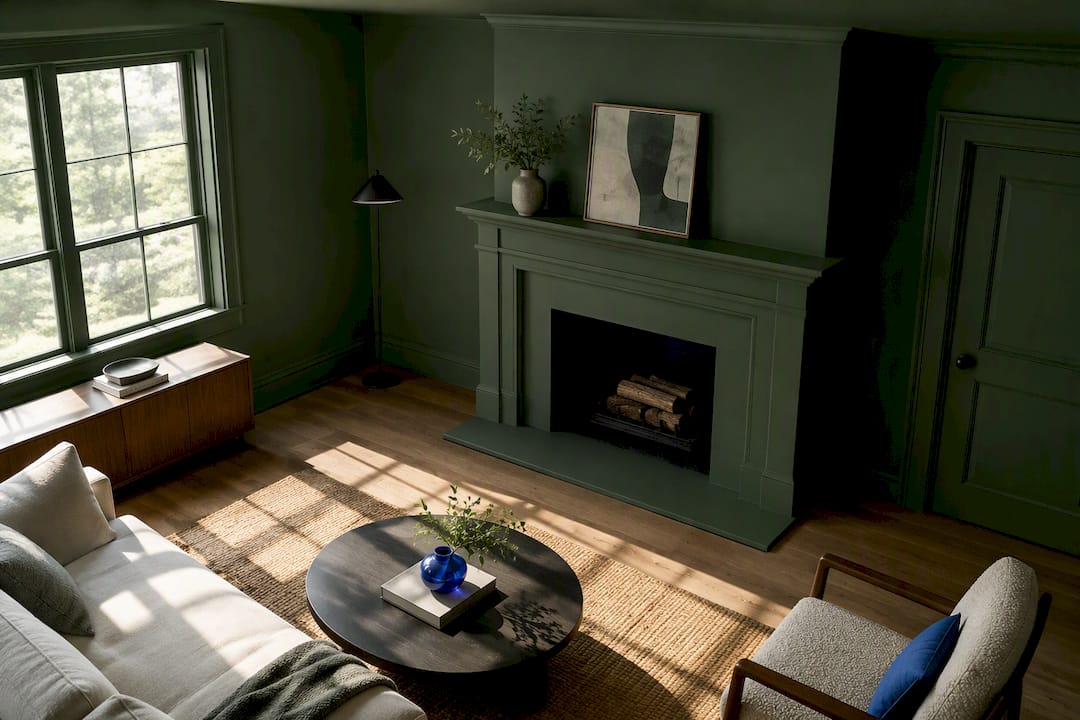
2. Color-drenching (walls and ceiling in the same hue)
Best for bedrooms and living rooms where you want an enveloping, cocoon-like atmosphere. Painted ceilings — including color-drenching — are a repeatable, high-impact treatment; use a satin or eggshell finish so the ceiling reads slightly different from the matte walls.
3. High-gloss lacquer ceiling
Best for entryways and dining rooms where light reflection creates a jewel-box effect. High-gloss lacquer ceilings require very smooth, well-prepared surfaces to appear flawless.
4. Two-tone ceiling (center field vs. border)
Best for rooms with crown molding where you want to define the ceiling plane without full color commitment. Paint the center field one color and the border a contrasting or complementary tone.
5. Black or near-black ceiling
Best for libraries, home theaters, and moody living rooms. A dark ceiling visually lowers the room and creates intimacy; pair with warm-toned lighting to prevent the space from feeling cold.
6. Soft blush or dusty pastel ceiling
Best for nurseries and primary bedrooms seeking gentle warmth. Pastels overhead read softer than on walls, making them an easy entry point for color-shy homeowners.
Wallpaper and partial wallpaper
7. Full wallpapered ceiling
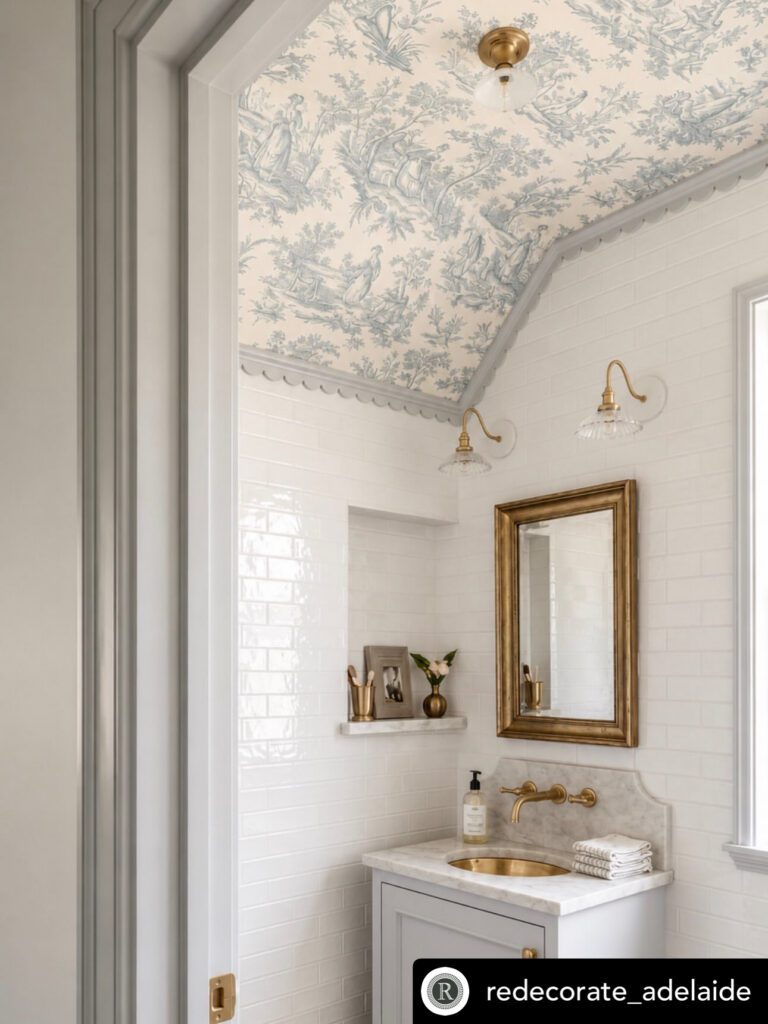
Best for dining rooms and powder rooms where the ceiling is a contained canvas. Choose a medium-scale pattern — very small repeats disappear overhead, while oversized ones can feel chaotic.
8. Tray inset wallpaper
Best for bedrooms and living rooms with existing tray ceilings. Wallpaper and partial applications limit risk and cost; papering only the recessed inset creates a framed, intentional moment without overwhelming the room.
9. Removable peel-and-stick ceiling wallpaper
Best for renters or anyone testing a pattern before committing. Apply to a clean, primed surface and remove without damage — a genuinely low-stakes way to try a bold print.
10. Botanical or sky-scene mural wallpaper
Best for sunrooms, breakfast nooks, and children’s rooms. A printed sky or garden scene overhead creates a sense of openness that works especially well in rooms with limited natural light.
Coffered and tray ceilings
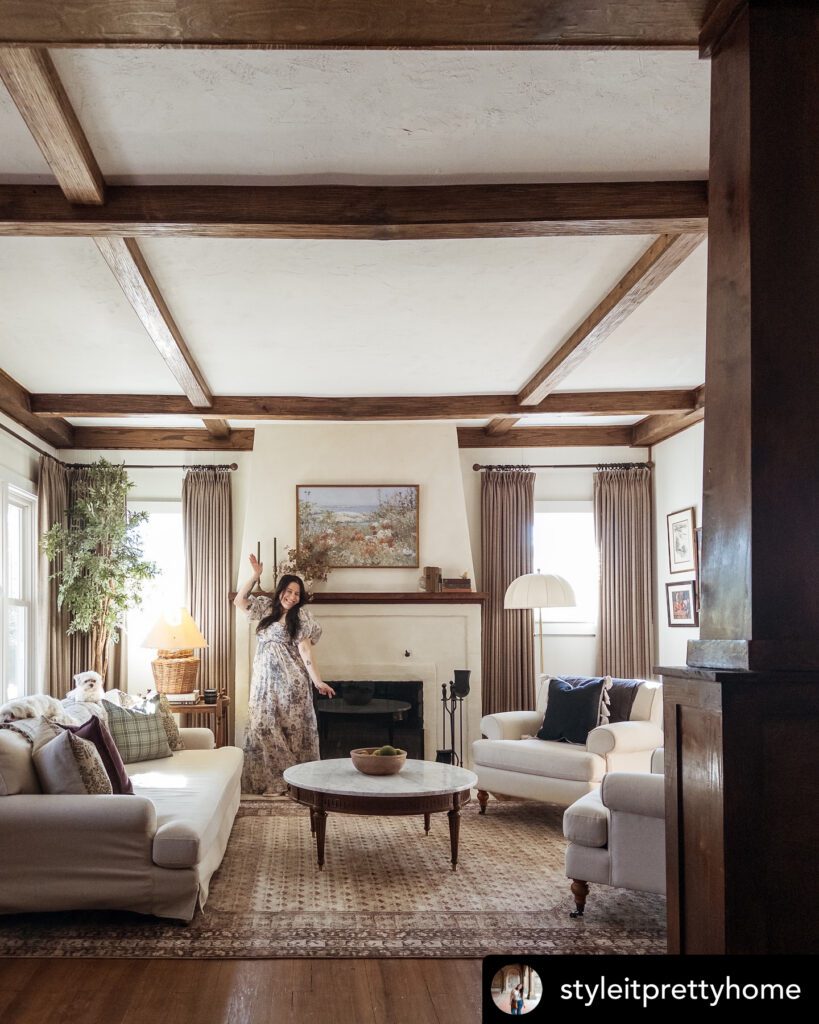
11. Classic coffered grid
Best for formal dining rooms and living rooms with ceiling heights of nine feet or more. Architectural ceiling elements like coffered grids are high-impact, higher-cost installs that typically require professional installation and add lasting resale value.
12. Painted tray ceiling with contrasting inset
Best for primary bedrooms where you want architectural definition without full construction. Paint the tray’s recessed field a deeper or more saturated version of the wall color.
13. Two-color coffered ceiling
Best for traditional or transitional interiors. Paint the coffers’ recessed panels a warm accent color and the beams white or cream for a layered, dimensional effect.
Exposed or faux beams and shiplap
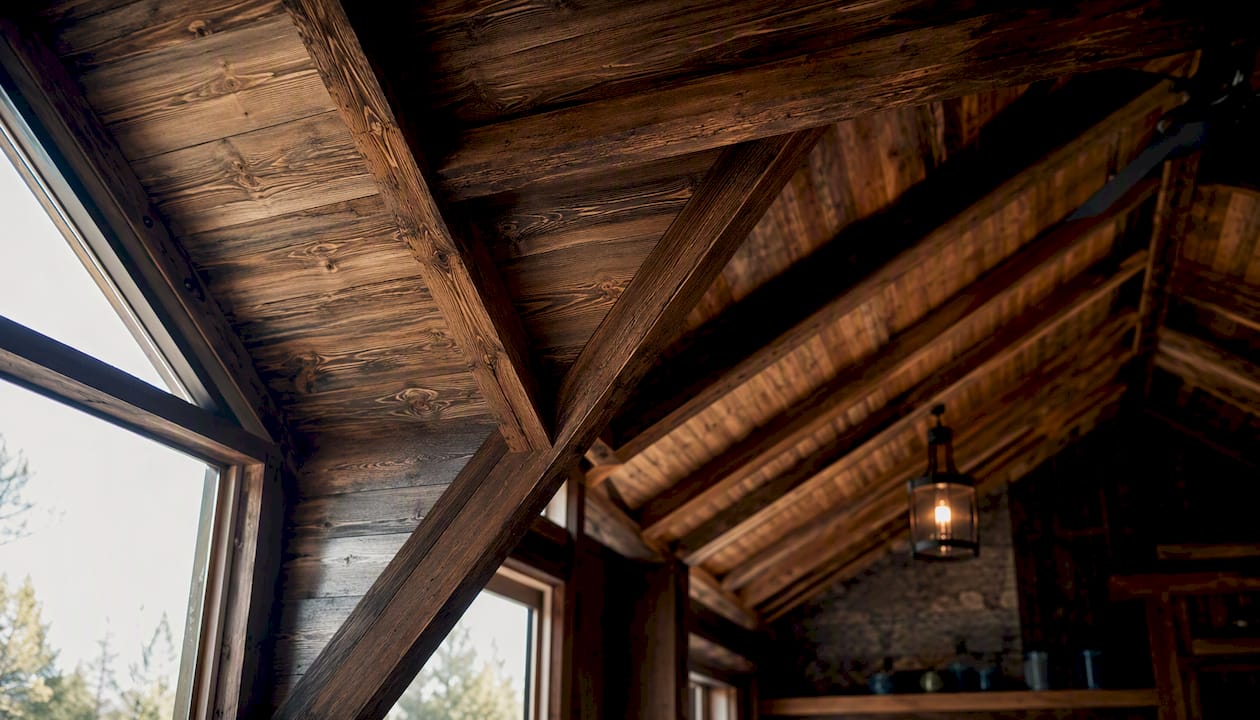
14. Stained wood beams
Best for rustic, farmhouse, or chalet-style interiors where warmth and materiality are central to the design. Real beams are structural or decorative; faux polyurethane beams offer a lighter, DIY-friendly alternative.
15. White-painted shiplap ceiling
Best for coastal, Scandinavian, or casual farmhouse rooms. Horizontal planks add texture without visual weight; paint them the same white as the walls for a seamless, airy effect.
16. Herringbone wood plank ceiling
Best for entryways and powder rooms where a small ceiling area can carry a complex pattern. The herringbone layout adds geometric interest that a simple horizontal run cannot.
Murals and geometric paint
17. Hand-painted ceiling mural
Best for dining rooms, nurseries, and spaces where art is the organizing principle. Commission a local muralist or use a projector to trace a design before painting — scale the composition to the room’s footprint, not just the ceiling’s dimensions.

18. Geometric stripe ceiling
Best for hallways and compact rooms where vertical stripes can suggest height. Tape off stripes in alternating sheens (matte and satin in the same color) for a subtle, sophisticated effect.
19. Color-blocked ceiling panels
Best for playrooms and eclectic living rooms. Divide the ceiling into quadrants or irregular shapes using painter’s tape and fill each with a different but coordinated color.
20. Stenciled pattern ceiling
Best for traditional or global-inspired rooms. A repeating stencil in a metallic or contrasting paint creates the visual richness of wallpaper at a fraction of the cost.
Metallic finishes and leaf
21. Gold leaf ceiling panels
Best for dining rooms and powder rooms where opulence is the intent. Apply gold leaf over a sized (adhesive-coated) surface in sections; the natural variation in the leaf creates an organic shimmer that paint cannot replicate.
22. Silver or champagne metallic paint
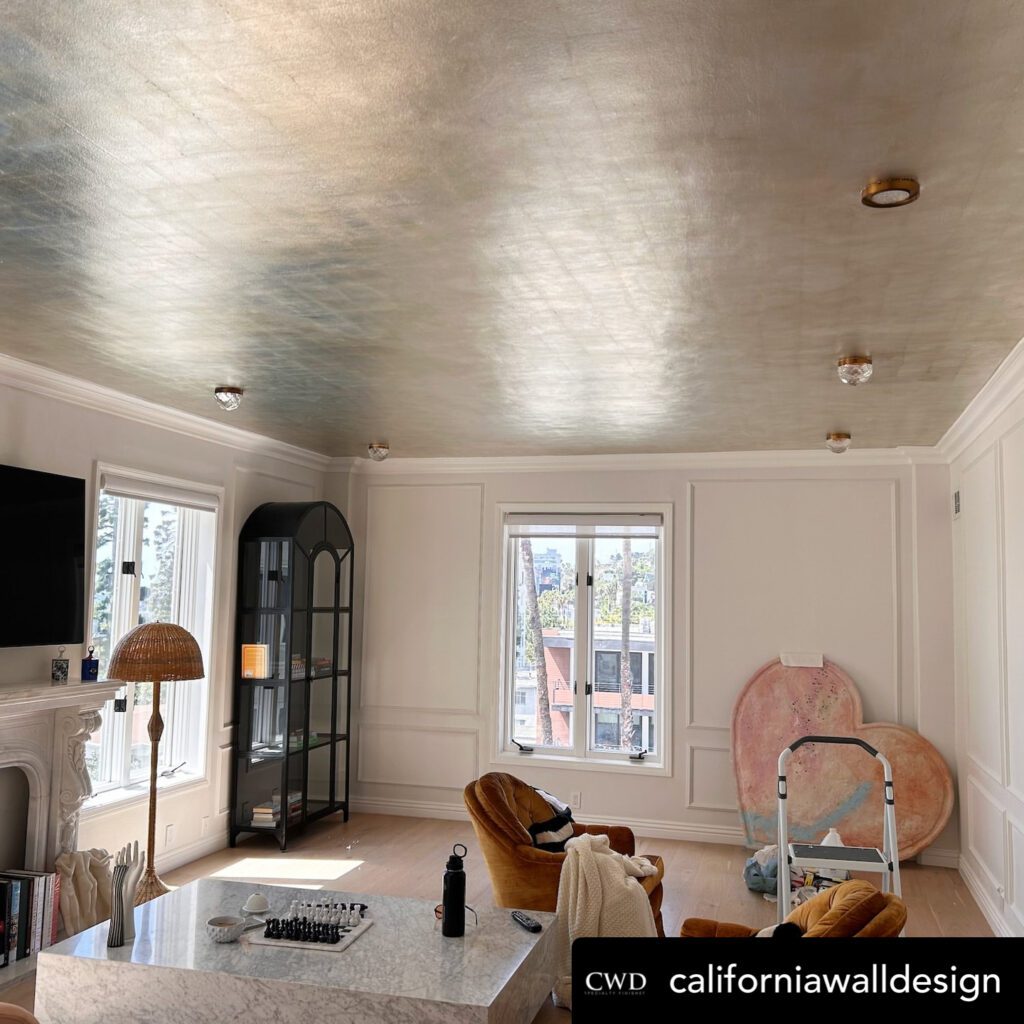
Best for contemporary bedrooms and bathrooms. Metallic paints reflect light differently than standard finishes — test a large swatch under the room’s actual bulbs before committing.
23. Antique mirror ceiling tiles
Best for small, dark rooms where reflected light is needed. Antiqued mirror tiles add depth and glamour without the full-ceiling commitment of a mirrored surface.
Tin and pressed-metal tiles
24. Classic tin tile ceiling
Best for kitchens, bars, and period-revival dining rooms. Tin tiles are available in peel-and-stick or nail-up formats; the latter requires more prep but produces a more durable, authentic result.
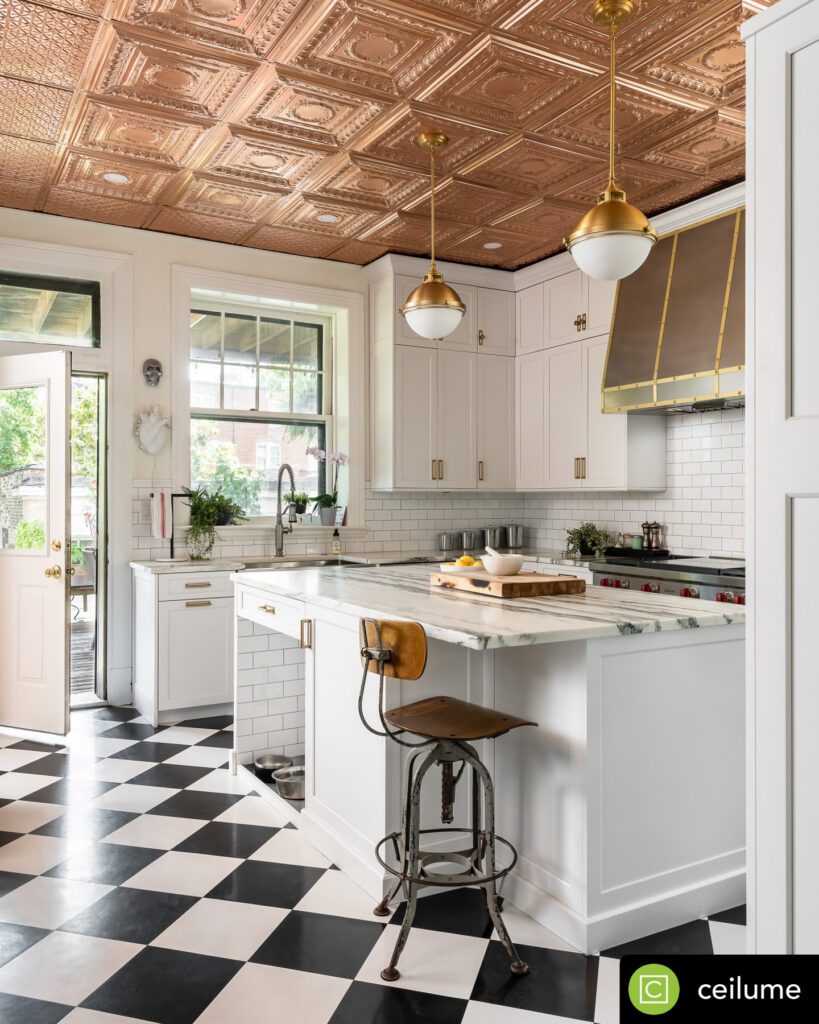
25. Painted tin tile ceiling
Best for spaces where you want the texture of tin without the metallic glare. A flat or satin paint over tin tiles softens the material and ties it to the room’s color palette.
Wood paneling and planks
26. Dark-stained wood plank ceiling
Best for home libraries and cozy reading rooms where an enveloping, intimate atmosphere is the goal. Dark wood overhead anchors the room and pairs naturally with warm-toned task lighting.
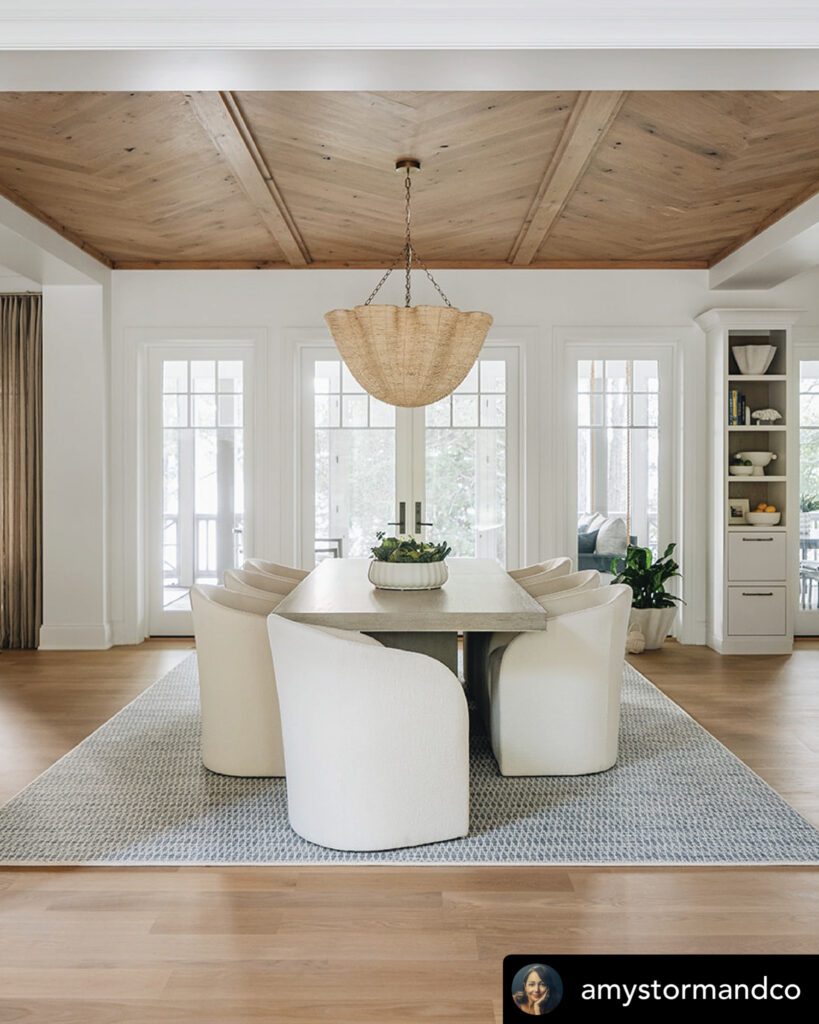
27. Whitewashed wood ceiling
Best for coastal and transitional interiors. A whitewash finish preserves the wood grain’s texture while keeping the ceiling light and airy.
Textured plaster and 3D treatments
28. Venetian plaster ceiling
Best for Mediterranean, eclectic, or contemporary rooms where surface depth and luminosity matter. Venetian plaster requires skilled application but produces a finish that shifts subtly with changing light.
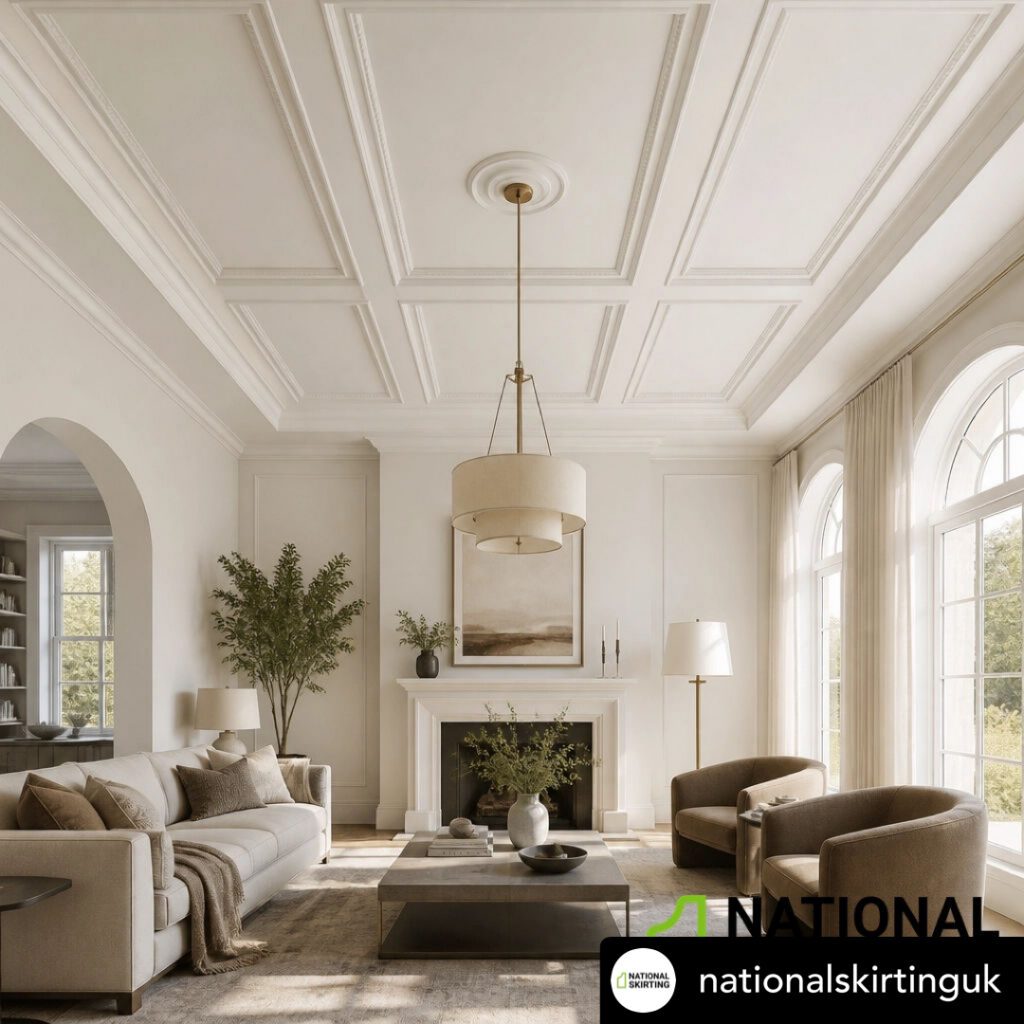
29. 3D plaster or POP moulding panels
Best for modern interiors where sculptural geometry is the design language. Modern ceiling trends favor layering and 3D elements — POP (plaster of Paris) moulding panels are a cost-effective way to achieve this effect.
30. Fabric-wrapped acoustic ceiling panels
Best for home offices, media rooms, and open-plan living areas where sound control is as important as aesthetics. Panels can be upholstered in any fabric and arranged in a grid or asymmetric pattern for a gallery-like effect.
Three budget-friendly picks: removable peel-and-stick wallpaper (#9), stenciled pattern (#20), and white-painted shiplap (#15).
Three high-impact, higher-cost installs: classic coffered grid (#11), gold leaf panels (#21), and Venetian plaster (#28).
2. How to choose the right ceiling treatment for your room
The right ceiling treatment depends on a handful of honest questions. Ceiling height is the first filter: rooms under eight feet tend to struggle with heavy architectural elements like deep coffers or thick beams, which can make the space feel compressed. Rooms with nine feet or more can carry almost any treatment. Natural light matters too — high-gloss and metallic finishes amplify whatever light enters, while matte and textured surfaces absorb it, creating warmth rather than brightness.
Room function shapes the decision as much as aesthetics. A kitchen ceiling needs moisture-resistant materials; a home office benefits from acoustic attenuation; a powder room can carry almost any bold treatment because the exposure time is short and the square footage is small. Think about permanence preference honestly: coffered ceilings and structural beams are decade-long commitments, while painted ceilings and removable wallpaper can be changed in a weekend.
Scale matters more than most homeowners expect. Coffer grids must be scaled appropriately to room size; overly large or small panels can overwhelm or underwhelm the space. Wallpaper pattern repeats should be sized so at least two full repeats are visible across the ceiling’s width. Murals benefit from a central focal point aligned with the room’s primary sightline, usually from the doorway.
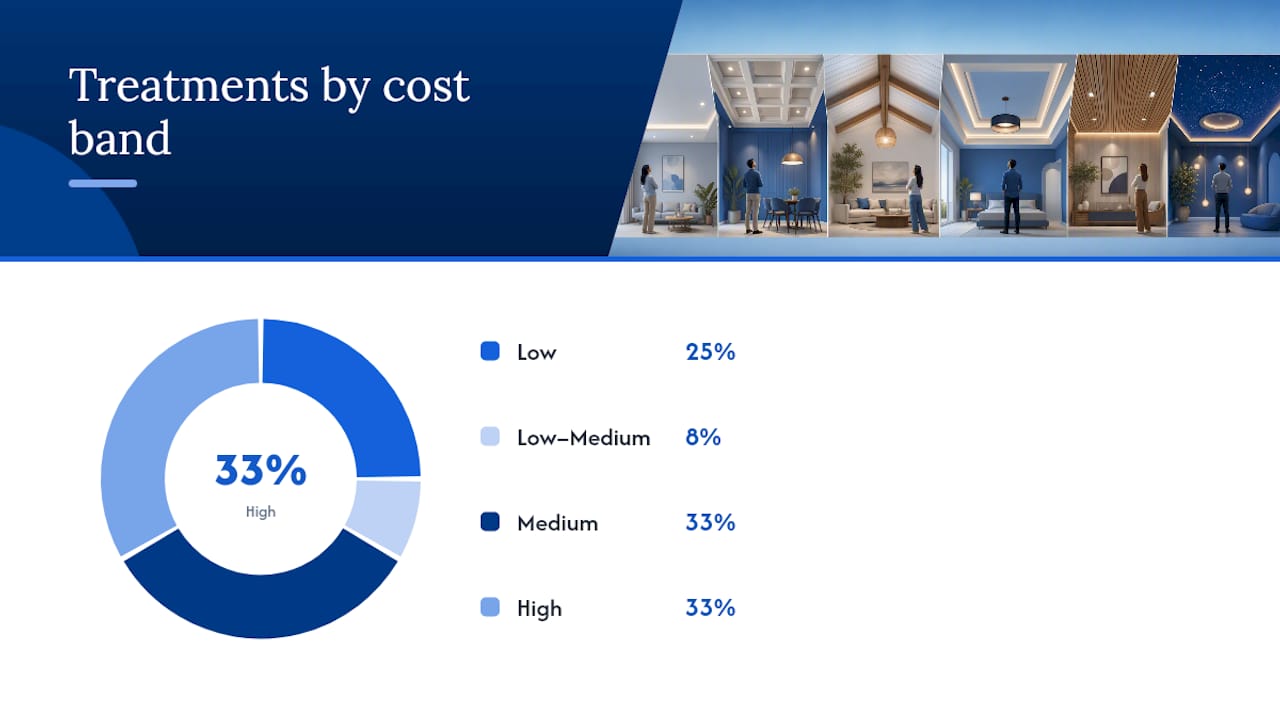
| Treatment | Cost/Commitment Band | Typical Disruption |
|---|---|---|
| Paint (solid, color-drenching) | Low | Minimal — one to two days, no trades needed |
| Removable wallpaper | Low | Minimal — DIY-friendly, reversible |
| Traditional wallpaper | Medium | Moderate — surface prep, possible professional hang |
| Shiplap / wood planks | Medium | Moderate — one to two weekends, basic carpentry |
| Tin tiles (peel-and-stick) | Low–Medium | Minimal to moderate — DIY-friendly |
| Tin tiles (nail-up) | Medium | Moderate — surface prep, basic tools |
| Tray ceiling (paint only) | Low | Minimal — existing architecture required |
| Faux beams | Medium | Moderate — blocking and fastening required |
| Coffered ceiling | High | Significant — framing, drywall, finishing trades |
| Real structural beams | High | Significant — structural assessment, contractor |
| Venetian plaster | High | Significant — skilled plasterer required |
| Gold leaf | High | Moderate to significant — specialist applicator |
On acoustic considerations: open-plan rooms, home offices, and media spaces often need ceiling treatments that absorb rather than reflect sound. Hard surfaces — tin, high-gloss paint, mirror tiles — increase reverberation. If sound control matters, fabric-wrapped panels, wood planks with insulation above, or acoustic plaster systems address both aesthetics and function simultaneously.
3. Materials and finishes: what works where and why
Paint: matte, satin, and high-gloss/lacquer
- Matte: Hides surface imperfections well; absorbs light for a soft, velvety effect; harder to wipe clean; best for bedrooms and living rooms with smooth ceilings
- Satin/eggshell: The practical middle ground; slightly reflective, easier to clean than matte; suits most rooms including kitchens and hallways
- High-gloss/lacquer: Reflects light dramatically; requires a flawlessly smooth, primed surface; high-gloss ceilings capture and reflect natural light in ways that can make a room feel larger; demanding to clean without streaking
- Moisture suitability: Satin and semi-gloss hold up in bathrooms and kitchens; matte paint absorbs moisture and can peel in humid conditions
Wallpaper: removable vs. traditional
- Removable/peel-and-stick: Low commitment, renter-friendly, wide pattern range; adhesion can weaken in humid rooms; not suitable for textured ceilings without a skim coat
- Traditional paste wallpaper: More durable and better suited to complex patterns; requires proper surface prep and is harder to remove; choose moisture-resistant or vinyl-coated options for kitchens and bathrooms
- Qualitative budget range: Removable wallpaper sits at the low end; traditional wallpaper with professional installation moves into the medium range
Wood, shiplap, and paneling
- Pros: Warmth, texture, biophilic richness; wide range of species and finishes; can be painted or stained
- Cons: Weight requires secure fastening into joists; real wood can expand and contract with humidity; cost rises quickly with premium species
- Moisture suitability: Sealed and painted wood can work in low-humidity kitchens; avoid untreated wood in bathrooms
Metal and tin tiles
- Pros: Durable, period-authentic, available in dozens of patterns; peel-and-stick formats are DIY-accessible
- Cons: Hard surfaces increase sound reverberation; metallic finishes show fingerprints and dust; installation over uneven ceilings requires a drop-ceiling grid or skim coat
- Maintenance: Wipe with a damp cloth; avoid abrasive cleaners on polished finishes
Plaster and textured finishes
- Pros: Sculptural depth; Venetian plaster produces a luminous, shifting surface; POP moulding panels offer geometric precision
- Cons: Skilled application required for Venetian plaster; textured surfaces are harder to repaint cleanly; cracks can appear with building movement
- Qualitative budget range: Textured plaster sits at the high end; pre-made POP panels are medium
A note on color overhead
Paint appears darker and more saturated on ceilings than on walls. Professionals recommend applying large test swatches directly on the ceiling under the room’s typical lighting before finalizing any color. What reads as a soft sage on a paint chip can read as a deep forest green once it’s overhead and surrounded by reflected light from the floor.
4. DIY vs. hiring a pro: how to decide
Paint (any sheen): Fully DIY-friendly. You need a quality roller, an extension pole, painter’s tape, and a weekend. Prep — filling cracks, sanding, and priming — takes as long as the painting itself. Timeline: one to two days.
Removable wallpaper: DIY-friendly for smooth ceilings. Work with a partner; ceiling papering is awkward alone. Clean and prime the surface first. Timeline: one day.
Traditional wallpaper: DIY-possible for experienced hangers, but ceiling applications are physically demanding. A professional wallpaper hanger reduces waste and misalignment risk significantly. Timeline: one to two days with a pro.
Shiplap and beadboard panels: DIY-friendly if you’re comfortable with a miter saw and a nail gun. Locate joists first; every plank needs a secure fastening point. Timeline: one to two weekends depending on room size.
Faux beams: DIY-possible. Lightweight polyurethane beams attach with construction adhesive and screws into blocking. Plan the layout carefully before cutting. Timeline: one weekend for a standard room.
Coffered ceilings: Hire a contractor. Coffered ceilings involve framing, drywall, taping, and finishing — multiple trades working in sequence. Attempting this without experience leads to misaligned grids and costly repairs. Timeline: one to three weeks depending on complexity.
Structural beams: Always hire a licensed contractor and, where required, pull a permit. Structural work affects load paths; an engineer’s assessment may be needed before installation begins.
Integrated recessed or cove lighting: Hire a licensed electrician. Retrofitting fixtures into decorative ceiling treatments is costly and technically difficult; plan all wiring before any surface treatment goes up. Timeline: coordinate electrician work before finishing trades.
Venetian plaster and gold leaf: Hire a specialist. Both require trained hands and specific tools; amateur application produces results that are difficult to correct without stripping the surface.
Murals: Hire a muralist for freehand work, or use a projector-trace method for DIY. A projector allows you to scale a design accurately without freehand drawing skill. Timeline: two to five days for a professional muralist.
On permits: coffered ceilings, structural beams, and any work involving new electrical circuits typically require permits in most U.S. jurisdictions. Check with your local building department before starting. Electrical work that touches the panel almost always requires a licensed electrician regardless of permit status.
5. How lighting and fixtures work with your ceiling treatment
Lighting and ceiling treatments are inseparable design partners, and the sequence matters: plan the lighting first, then choose the finish. A high-gloss lacquered ceiling with a single centered pendant will create a beautiful reflection, but the same ceiling with poorly placed recessed cans will produce glare spots that undermine the entire effect.
Key principles for fixture placement:
- In coffered ceilings, center one recessed fixture in each coffer panel for a grid-like, intentional pattern; avoid placing fixtures on the beams themselves
- Tray ceilings suit cove LED strips along the inner ledge, which wash the recessed field with soft, indirect light and emphasize the architectural depth
- Beamed ceilings work well with pendant lights hung between beams rather than through them; track lighting mounted on a beam can direct accent light to artwork or furniture below
High-gloss and lacquered ceilings change the character of every light source in the room. A warm-toned bulb (2700K–3000K) produces a rich, amber reflection; a cool daylight bulb (5000K+) can make the same ceiling feel clinical. Test your actual fixture bulbs against a large painted swatch on the ceiling before finalizing the color.
Pro Tip: Sample your ceiling finish in situ — paint at least a two-foot-square patch directly on the ceiling and live with it through a full day’s light cycle, from morning sun to evening lamp light, before ordering materials or committing to a full application.
Layered lighting — ambient, task, and accent working together — serves decorative ceilings better than a single source. Cove lighting along a tray’s perimeter handles ambient; a statement pendant or chandelier provides the focal fixture; directional recessed or track lights handle task and accent. This layered approach also means no single fixture has to work too hard, which extends bulb life and keeps the ceiling treatment looking its best.
6. Preparation, maintenance, and longevity
A ceiling treatment’s longevity depends almost entirely on what happens before the first brush stroke or panel goes up. Skipping prep is the single most common reason statement ceilings fail within a few years.
Pre-installation checklist:
- Repair all cracks, nail pops, and surface imperfections with joint compound; sand smooth and prime before any finish coat
- Check for moisture stains — a brown ring on the ceiling means an active or past leak; address the source before finishing, or the stain will bleed through any paint
- Verify ventilation in kitchens and bathrooms; inadequate airflow causes paint to peel and wallpaper to delaminate
- Map all lighting and electrical runs before installing any surface treatment; moving wires after shiplap or plaster is in place is expensive
- Prime with a ceiling-specific primer, especially before high-gloss or dark paint; primer seals the surface and improves adhesion
Maintenance by material:
- Paint: Touch up scuffs as needed; repaint every five to eight years or when the finish dulls noticeably; high-gloss ceilings show marks more readily and benefit from a gentle wipe with a damp microfiber cloth
- Wallpaper: Inspect seams annually; re-glue lifting edges promptly; traditional wallpaper in good condition can last ten to fifteen years; removable wallpaper typically lasts three to five years before adhesion degrades
- Wood and shiplap: Dust regularly; refinish or repaint every seven to ten years; check for moisture damage annually in kitchens and bathrooms
- Tin tiles: Wipe with a damp cloth; avoid abrasive cleaners; repaint painted tin every five to seven years
- Plaster: Inspect for cracks annually; hairline cracks in Venetian plaster can be filled and burnished by a skilled plasterer; avoid steam cleaning
Common pitfalls to avoid:
- Painting over an unprimed, stained, or textured ceiling without proper prep — the finish will look uneven and may peel
- Choosing a sheen level without testing it overhead; matte hides flaws but shows marks, while gloss reveals every imperfection
- Installing wallpaper on a ceiling that hasn’t been skim-coated; texture telegraphs through even thick wallpaper
- Ignoring acoustic implications in open-plan rooms; hard ceiling surfaces amplify noise, and a beautiful tin tile ceiling in an open kitchen can make conversation exhausting
For rooms where sound control is a genuine need, fabric-wrapped acoustic panels, wood planks with mineral wool insulation above, or acoustic plaster systems address both aesthetics and reverberation simultaneously. These are not afterthoughts — plan them into the design from the start.
7. Designer-backed tips for lasting, confident ceiling choices
The most consistent advice from designers working with decorative ceilings comes down to two disciplines: test before you commit, and plan lighting before you finish.
That guidance carries real weight. A color that feels like a soft, dusty blue on a paint chip can read as a saturated cobalt once it’s overhead and surrounded by reflected light from floors and furniture. The fix is simple: paint a two-foot-square swatch directly on the ceiling and observe it across a full day’s light cycle before ordering a full gallon.
Designers also emphasize that contrast between walls, trim, and ceiling is what creates a space that feels personal rather than generic. A ceiling painted the same color as the walls reads as intentional color-drenching; a ceiling painted a contrasting shade reads as architectural punctuation. Neither is wrong, but the choice should be deliberate.
Pro Tip: Plan your lighting wiring before any surface treatment goes up. Retrofitting recessed or cove lighting into finished shiplap or decorative plaster often requires deeper ceiling cavities and significantly raises the cost of the project.
A few practical rules of thumb that hold across most projects: dark ceilings work best when the room has strong natural light or layered artificial lighting; metallic finishes need warm-toned bulbs to read as luxurious rather than cold; and architectural treatments like coffers and beams should always be scaled to the room’s footprint, not chosen from a catalog photo taken in a much larger space.
For rooms where you want the ceiling to carry a genuine artistic moment, consider commissioning an original work. Artinlifestyle’s art concierge service connects homeowners with artists whose work translates beautifully to large-scale ceiling applications, from abstract compositions to geometric studies.
8. Our perspective on choosing your statement ceiling
The ceiling conversation almost always starts with a single question: how bold is too bold? The honest answer is that “too bold” is almost always a function of poor execution rather than the treatment itself. A black ceiling in a room with inadequate lighting feels oppressive; the same black ceiling with layered warm light and reflective surfaces feels like a jewel box. The treatment is rarely the problem. The planning usually is.
What Artinlifestyle consistently recommends to homeowners is to start with one low-risk room — a powder room, a walk-in closet, a small hallway — and treat it as a laboratory. Paint it a color you’ve been afraid to use. Paper the ceiling with a pattern that feels too much. Live with it for a season. The rooms that feel most alive in any home tour are almost always the ones where someone took a considered risk on a surface most people leave white.
The 2026 home trends Artinlifestyle has been tracking show ceilings moving firmly into the design conversation, not as a novelty but as a standard expectation for thoughtfully designed interiors. Pair that with the gallery wall ideas and bedroom trend resources on the site for a complete picture of how the fifth wall fits into a cohesive room design.
If you’re ready to move from inspiration to execution, explore Artinlifestyle’s DIY home decor resources for step-by-step guidance, or reach out to a design professional for treatments that involve structural or electrical work.
Sources
- 13 Designer-Approved Ceiling Ideas That Are Anything but Boring
- 30 Painted Ceiling Ideas That Majorly Upgrade Any Room | Apartment Therapy
- Ceiling design ideas
- 22 Ceiling Design Ideas to Make a Statement
- Ceiling ideas inspiration
- Trendy Modern Ceiling Design Ideas for Every Home